Wednesday, October 29, 2008

Mordheim Terrain - Entry 1

So, its been quite a while since i updated this blog. In the next few months I will be kicking off a Mordheim campaign, and that got me motivated to do some serious terrain building. While I didn't successfully pull off any "in-process" shots to show how it was done, I've got the following images to detail my effort thus far. For scale, all these buildings but the dockyards are on 12x12in sheets of MDF.

The first is a stonemason's house. Just a basic house with a few docorative bits. Includes a second floor deck and destroyed walls for placing/hiding models.


The second is the most complete of the buildings, one I've come to call "Bill the butcher's". Complete with stable area for animals, butcher's block in the front yard, and hanging dead cow (thanks GW giant kit).


The next up is the 50% complete first-half of the mordheim dockyards. I see it eventually spanning 2 1x2ft seconds so it could form an entire board edge. The basic structure is done, but needs "mordheimizing" as I call it, adding broken beams, beams and creates floating in the water, and lots of crates along the docks. I haven't decided yet whether one of the dock sections will actually have a ship at it to provide even more high places and cover.


Fourth is the old-mill. The basic structure is completed. It still needs a roof. Also, as its a solid structure, I'm planning to add stairs/platforms/walkways around the outside of it to provide places for models to go, as well as some fallen/pilled logs on the base.


Next is the Dwarf Forge, about 60% complete. The walls still need to be constructed, the chimney finished, and something constructed in the fenced in area. I'm seeing myself using some bitz from the dwarf anvil of doom set.


Last but not least is the clocktower. Its not your eyes, the structure is leaning somewhat, and in true GW/Empire fashing is held up with supports and chains. This has completed rickety ramps and platforms around it for models to climb/snipe from. Not sure what else to decorate around the base. A detail to notice are the clock hands are two-feiry comets, forming a twin-tailed comet during most times of the day.


That is all for now. Updates coming when new things are completed. Most of the future new buildings will be town squares and ruined standard buildings.

Tuesday, March 25, 2008

'Arvard Ardboyz Logo

When putting together name placards for the new 'Ardboyz display case I came to the realization that the club didn't have a true "logo". I was sitting, relaxing after a long Monday following a long weekend, and had a moment of inspiration while looking through one of the recent White Dwarf Magazines at the Gazkull miniature. I picked up a pencil and starting sketching, the the image below was the result.


Saturday, March 15, 2008

Battle Fleet Gothic Terrain

The following are a few pieces of cellestial terrain for use in Battle Fleet Gothic, a spaceship combat game set in the Warhammer 40k universe. They were done as preliminary proof-of-concept pieces prior to a BFG terrain project event being held in a few weeks.


The first is a planet. It was created from a foam ball I bought in a crafts store, with a piece of wire coat hanger punched through it to act as a support. The ball was painted with watered down wood glue prior to spraw painting to prevent the spray paint from melting the foam. Once the basecoat was painted on and dry, I simply drybrushed bands of color around the circumferance of the sphere at varying heights to create a swirling gas-giant effect.


The other three pieces are gas clouds. They are made from MDF/hardboard cut into irregular shapes. Their edges were smoothed with a hand sander, and then they were spray painted black. The gas cloud effect was created simply by dry brushing a dark color onto the board (purple and blue in this case). Then, additional drybrushes were performed with lighter shades of the base color, moving closer and closer to the center of the cloud. I used a streciling brush, as the large flat end of the brush allowed for a good combination of drybrushing and stipling. After the cloud was completed stars of varying size were painted on using white paint and a fine brush.


Tuesday, January 22, 2008

Working with Plasticard

Just a quick update this evening. It was a long day at work. Alot of people are huge fans of the Forgeworld vehicle doors, themed to particular 40k Space Marine armies. While extremely detailed and fantastic looking on the tabletop, they tend to hit the wallet rather hard. 

For those who wish to save some money for anniversaries/christmas/retirement/gas to get to work, here's a low-cost alternative. As I've mentioned in other threads, plasticard, or sheet styrene, is an extremely flexible modeling tool. It can be used to create many basic shapes relatively easily, giving a more 3-dimensional look rather than simple paint-on designs. 
The following steps make it relatively simple

1) trace the outline of the door you wish to decorate onto some white paper (graph paper also works well for symmetrical designs)
2) draw the design on the paper, staying within the traced outline of the door
3) using the side of your pencil, rub graphite onto the back side of the paper behind the design
4) tape the sheet of paper onto a sheet of plasticard
5) trace over the design with a pencil, pressing down hard. This should transfer the design to the sheet of plasticard underneath.
6) remove the sheet of paper, and cut out the design with a sharp exacto knife. 
7) glue the cut-out design to the vehicle door, and prime and paint as normal.

Take it slow on any curves in the design, as plasticard tends to cut/break better in straight lines than on curves. If you want to get fancy you can use a couple layers of overlapping designs. 
Below are a pair of top rhino doors I created for a Deathwatch Killteam Rhino.


Monday, December 10, 2007

Big Beasts of Chaos

For the last week or so, I've been working on converting two large models for my Mortal Chaos Army, both to add a little more punch, and take advantage of two recently-released fantastic model kits.

A Monumental Task
The first is a mutant monstrousity, a giant mutated to a level which would make the great scheamer Tzeentch proud.


The conversion primarily involved the following:
  • Bitz from the giant boxed set
  • Leftover spawn bitz
  • A few random Chaos bitz
  • A little green stuff
For starters, I assembled him as a pretty standard chaos giant. The primary differences involved the giants feet and head. For the feet, I used one of the "chaos" hooved feet and a single normal giant foot. For me, Chaos is supposed to be exactly that, Chaotic, and mutations shouldn't be conveniently symetrical.  For the head, I figured two were better than one. This part of the conversion took very little work, as the two heads fit onto the neck rather well. I only needed to shave the inside surface of each head a little so they fit together better.


Next, I decided to pull out the ever-so-useful spawn bits. Ever since starting my Chaos army, this kit has been invaluable, providing not only 2 extremely-cool-looking chaos spawn, but a near bottomless bag of mutations. First I added a tentacle to one side of the giant's torso, and a thin taloned-arm to the other (once again, symmetry = BAD). The image below also shows the flamer mouth I blended into the giants stomach using green stuff.


I also added several arachnid/ insectoid arms down his spine. On this model, the green stuff was used primarily to smooth transitions and make the various components fit together better. The only true sculpting I did was the exposed spine, because according to GW, nothing says chaos mutation like seeing someone's spine bursting from their back.  


Lastly, for the random chaos bitz, in addition to the flamer mouth on his stomach, I used several marauder/warrior shields for his arm guards, replacing the empire-themed shields included in the giant kit.

Fighting Fire with Napalm
With the recent release of the new High Elf army book, a large number of High Elf players are taking to the Warhammer tabletop with one or more of the new dragons.  As I am unable to field either Matthew McConaughey or Dennis Quaid in my Chaos army to combat these terrors (bonus points if you know the movie references), I decided to take advantage of the phenominal new plastic kit and convert myself a two-headed chaos dragon.


First, for the easy parts of the conversion. Using a hobby knife, I carefully trimmed away the High Elf themed-patterns on the dragon's armor, including all the various gems and flames/stars. The bare armor plates were plane yet jagged enough to pass for a chaos army.


Next, I converted the base, gluing on lots of spare chaos banners, shields, helmets, skulls, and weapons to make it resemble a herdstone with trophies piled at its base. 


The most difficult part of the conversion involved giving the dragon two tails and heads. Tails were the simpler of the two. I trimmed a roughly 45 degree chuck of plastic away from one side of the base of each tail. This allowed me to glue them together and have them fit correctly to the rear of the dragon's body. 


The hardest part were the twin heads. The dragon kit includes two heads, but only a single neck (which is actually part of the torso portion of the model). Additionally, one of the heads includes a little too much High Elf-themed armor to effectively make use of it for this conversion. 

The solution was inspired by the Galruch model, where the two heads are formed by the dragon's head and neck splitting down the middle as it is twisted by mutation. The first step was to cut the dragon's neck away from this body at the saddle. This took some careful hobby knife/saw work. I then attached a half of the unarmored dragon head to each neck piece, and attached the various spines/fins/horns to each head. Once again these were chosen to specifically make the two halves of the head look different and asymetric. 


Once the glue was dried, I trimmed the base of each neck so that when I glued them back to the dragon's body, they would aim in two different directions (one down and to the right, one up and to the left). This took several stages of trimming and test fitting to get right. I then was faced with the problem of filling the gap in each half of the head/neck. This was my first truly serious attempt at green-stuff sculpting. I first created a ribbed tube down the length of the neck to represent an esophegous (and conveniently fill up most of the empty space in the model). I then attached cris-crossing strips of green-stuff, teasing out the ends to look like stretched muscles, tendons and skin. As I was happy with how this turned out, to really try and push myself, I made an attempt at sculpting half of the dragon's brain in one of the two heads. 

For the rider, I used mostly the high elf dragon rider model with a few extra chaos bits. The body is a combination of the elf armored torso and mage legs, giving a half-warrior, half-wizard feel which matched my Tzeentch theme without using pieces which looked too "High-Elfy". The book and weapon arm are again from the original kit, but I replaced the axe head from the weapon arm with a flail of skills from marauder bitz. Lastly I added the head from the Tzeentch Disc rider, which was approximately the same scale as the high elf rider, and a cape from the marauder kit.

In the end, he's still weedier than most chaos models, but it won't be too noticeable when mounted on the back of the massive dragon. 

Up next, the first steps of painting this army.

Friday, November 30, 2007

Lord of the Rings Chess Set: Episode 1 - the Board

When it comes to GW games/miniatures, I'm a painter and modeler first and a gamer second. When Games Workshop released its Lord of the Rings game, I wasn't amazingly impressed with the gameplay. It was different than Warhammer/40k, but had some clunky aspects. I am, however, a bid fan of the Lord of the Rings books, the Movies, and many of the snazier miniatures.

My solution to this conundrum was to use the Lord of the Rings miniatures, but for an entirely different game. I've started constructing a chess set as a gift to my wife for Christmas. Hopefully the demands of work will allow me to finish it before December the 25th. 

The first step in its creation was the board, shown below. It started as simply a 4-ft length of 1x12, cut in half, and attached together with cabinet hinges to make a large 2ft x 2ft board. This board size was necessary to accommodate the wooden candle holders I planned to use as the chess pieces, which were about 2 1/4 in diameter. 


All of the patterns on the board were done with a wood-burning pen. This was perhaps one of the most time consuming parts of the chess set creation, and resulted in my entire house smelling like burned pinewood (my wife was thrilled with that). The squares were picked out using some leftover dark-wood stain from a previous home improvement project. The entire board was then coated in a light wood stain. 

Across the front of each side of the board is half of the script from the One Ring, "one ring to rule them all, and in the darkness bind them". 


Each of the 4 corners includes a styalized icon representative of the forces of good and evil: The White Tree of Gondor, a steed of Rohan, the Eye of Sauron, and the Hand of Saruman. 


Lastly is the Lord of the Rings logo. 


The next steps will be the basic painting of the gaming pieces. 

Advanced Basing 2: Space Hulk / Industrial Complex Bases

This is a very cool type of base I experimented with for some Deathwatch Marines. I was inspired after spending an evening at home watching an ALIEN marathon. Basically, rather than the grass/dirt covered fields which make up the bases of most 40k miniatures, I wanted the deathwatch team to appear as if they had boarded an abandoned vessel/ landed on a deserted industrial world and were seeking out those who caused its abandonment/desertion.  Its easier than the plasticard basing and cheaper as well.

Materials
- the bases of your choice
- normal window screen, available from your local home depot/hardware store. 
- normal plasticard, sheet plastic, cardboard, or even strips of the clear plastic from blisters
- random mechanical bits from your bitz box

Assembly
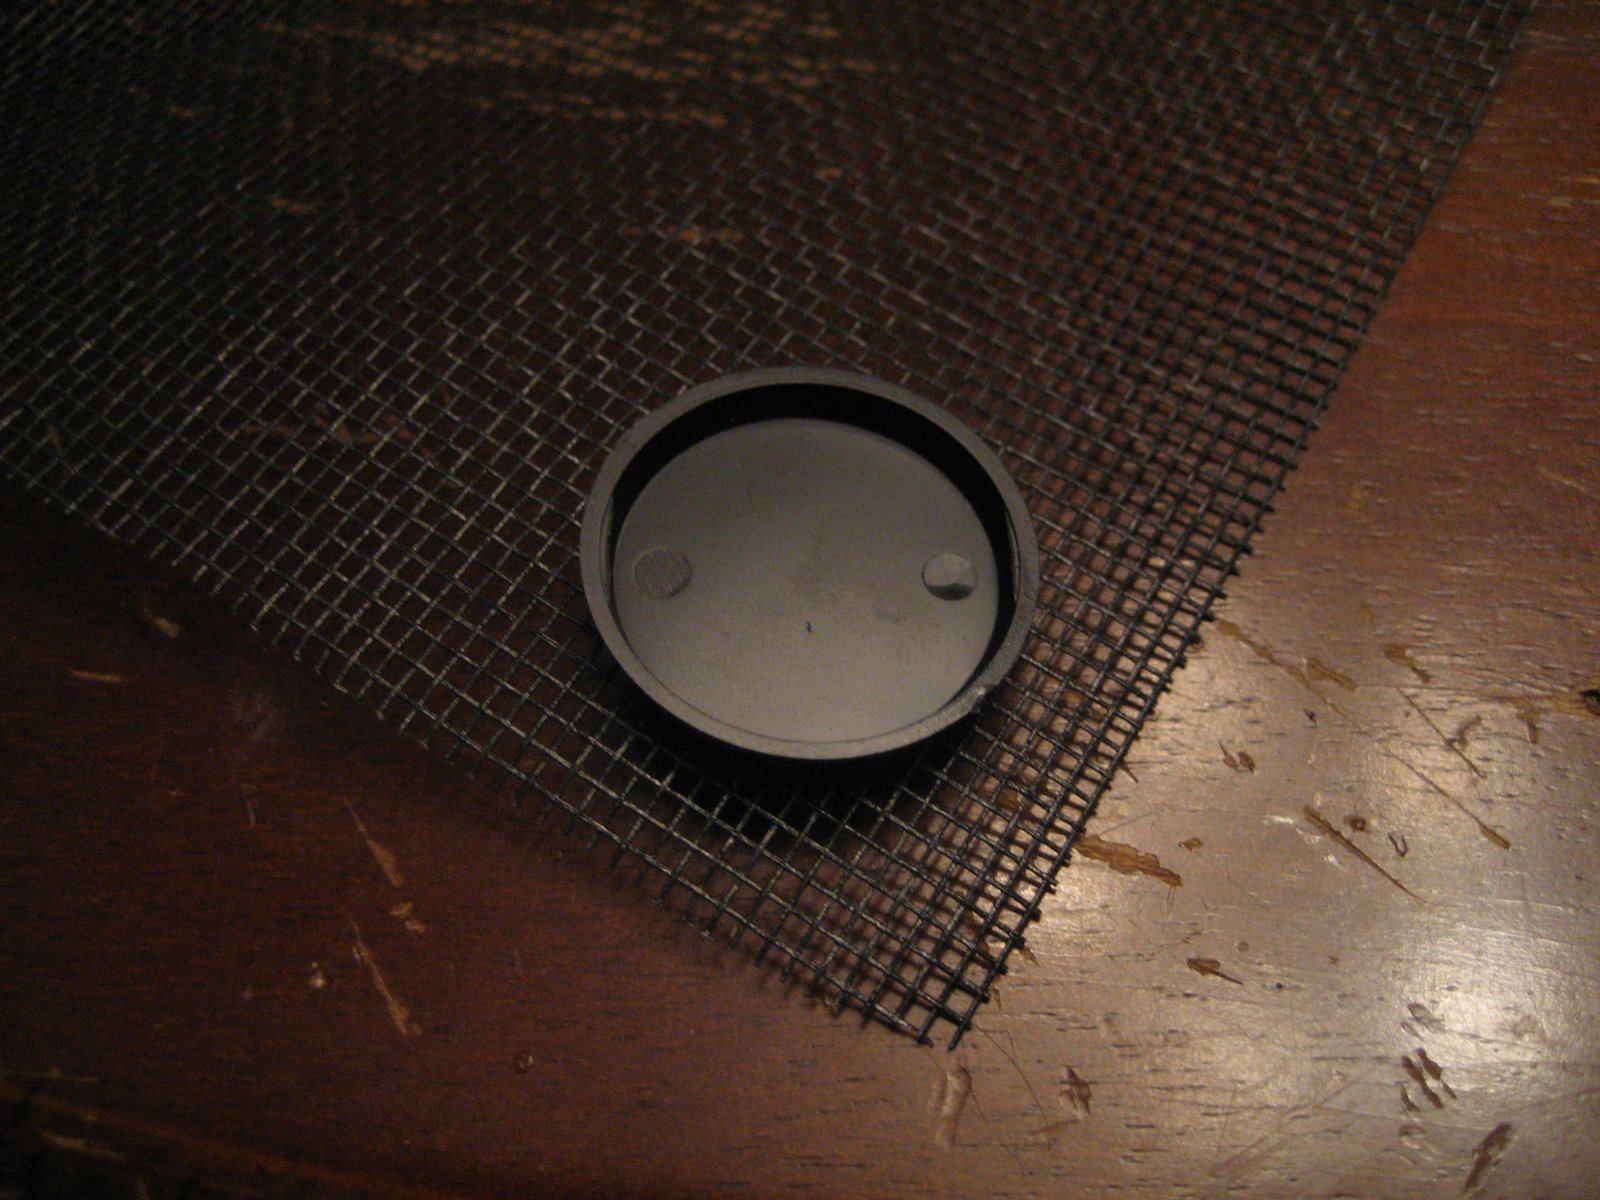
To start, layout a decent sized sheet of the window screen, enough for all the bases you plan to create. Take some white glue/elmers glue (non diluted), and apply it to the top of each base. Once you've applied glue to a base, turn it upside-down onto the window screen (be sure to do this on a surface which can take some abuse, as some white glue may seep through. No dining tables people). Do this for all the bases you plan to create and leave it to dry for a few hours.


Once the glue is dry, take a sharp knife and trace around the edge of the base. This may take a try or two, as the screen can be tricky to cut. It helps to press down hard on the base with your other hand (I didn't show this in the picture, as I only have 2 hands, and one needed to hold the camera). When you're done, the base should come free of the sheet of window screen, with the top surface of the base covered by the screen. 


The next step is to apply strips of plasticard/cardboard across the base. I typically use about 1/8in strips, pre-cut alot of them, and make sure they are longer than the base. Using plastic glue, I will glue the strips down to the surface of the base. Be sure to vary the pattern, some straight across, some halfway across, and leave some excess plastic hanging over the edges of the base. Once the glue has dried, use a hobby knight to cut off the excess plastic and make the strip flush with the edge of the base.


The only assembly step remaining is to glue down any mechanical-looking bitz from your bitz box/basing kits. I've found parts from heavy weapon teams and vehicle sprues work best.

Painting
Painting the base can be rather simple, but can also alow you to flex your painting skills if you wish. After priming black, start with a metal drybrush across the entire base, trying to cover the plastic sheets and the top of the window screen. Afterwards, apply a thinned-down black ink to the base to bring out the details of the screen mesh. That's all that's required. If you want to get fancier, here are some additional bits

scratches - its a floor from an abandoned facility, its shouldn't look shiny and new. Take a fine tip brush and a metallic color lighter than the one your drybrushed with, and paint small "slashes" at various angles across the sheet parts of the base. Then, take your drybrush color, add a little black to it, and paint a dark line directly next to each lighter line. The effect is that it appears there are deep gouges in the metal (shadows from the darker lines) with a sharp edge catching the light.

Chevrons - similar to those on Iron Warrior armor, these add some color to the base, and would be typical of a vessel/facility where personnel warnings might be necessary. They can either be the typical black/yellow, or red/white also works well. It all depends on the color of your miniatures.

Rust - once again, no shiny and new in a space hulk. prior to applying the ink wash, drybrush regions of the screen mesh, first with dark flesh or vermin brown, then with fiery orange. This technique also helps to add color and breakup the monocrome black/metal of the base.

Heres a few pictures of a dreadnaught base I created. It includes IG mortar and lascannon bits from a IG heavy weapon team, chevrons, and rust affects.